en

Please make sure to follow these instructions to keep your EXO monitors and yourself unharmed and running.
To avoid the risk of electrical shock, do not attempt to open the unit. There are no user-serviceable parts inside. Do not attempt to service the equipment yourself.
This unit should be connected to a grounded power outlet. If you use extension cords and power distributors they should be grounded as well.
Make sure that no liquids wet the inside of the cabinet. Never spray, pour or spill liquids directly onto the unit.
Do not use a wet cloth nor flammable or acid chemicals for cleaning.
Do not touch the diaphragms of the loudspeaker and do not obstruct the bass reflex ports.
Make sure there is enough air flow behind the loudspeaker to maintain the electronic components cool.
Do not expose this product to extreme temperatures.
The diaphragms build up a magnetic field around the loudspeaker.
High sound pressure levels can damage your hearing permanently! Avoid standing close to loudspeakers producing high sound pressure levels.
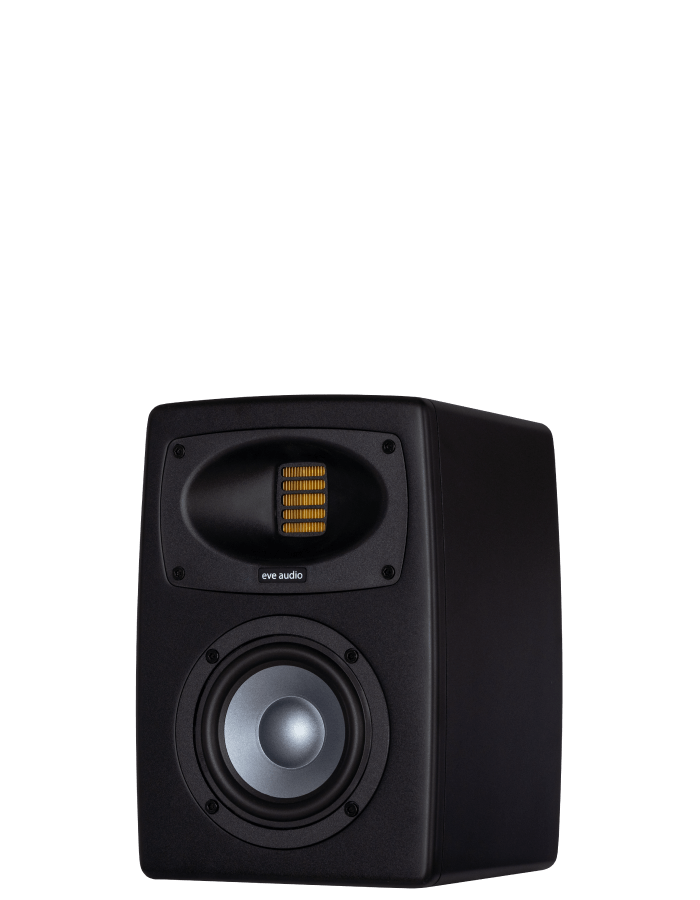
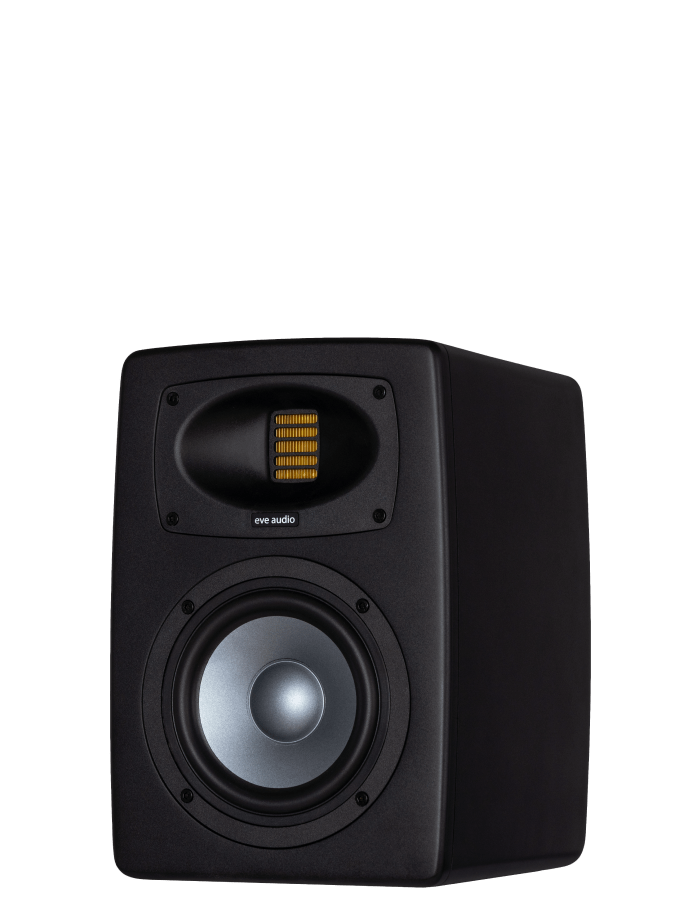
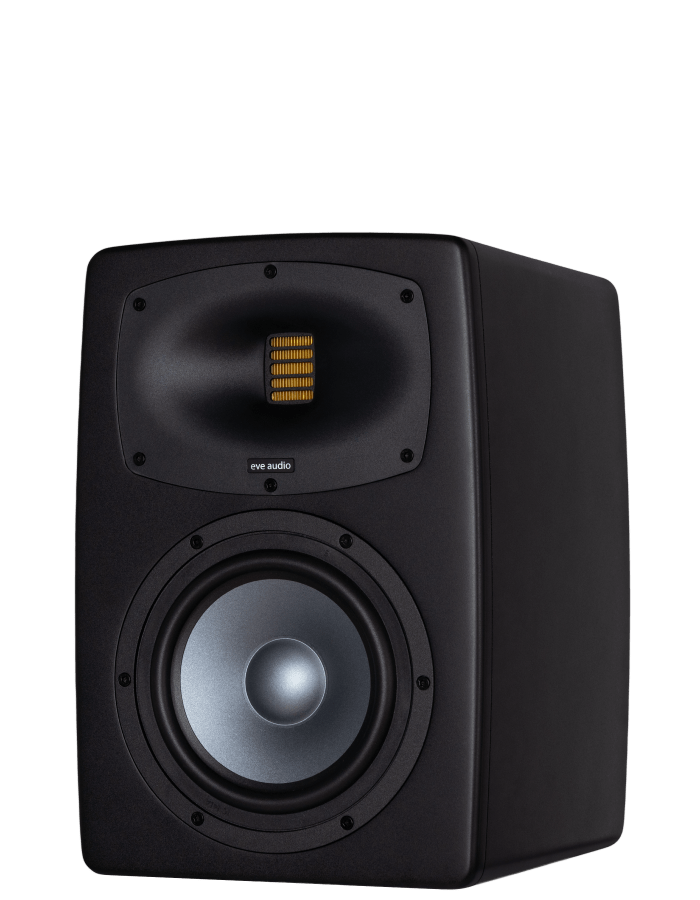
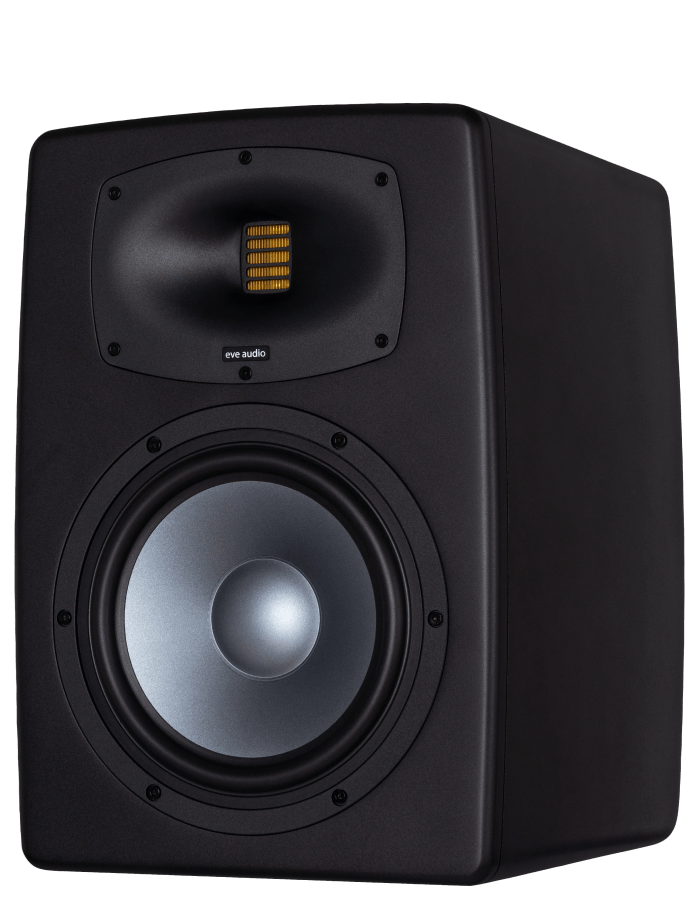
The EXO Series sets new standards in audio technology. The innovative Precision AirMotion Tweeter combined with an advanced GDC Waveguide ensures an ultra-wide sweet spot, perfect stereo imaging and a homogenous dispersion. The deep bass is precise and controlled, and this with great accuracy over the extended frequency range.
It is not just about sound, but a smarter workflow. The EXO Series redefines the EVE Audio sound with a completely new advanced acoustic design.
New confidence for your mix and production, that gives you full control on low-end and a professional extended frequency response for a clear and unique character in your creations.
A new rear-panel display makes on-speaker adjustments easy on the fly without disrupting your creative flow, just a tap away from your needs.
Whether you are in a high-end studio, a compact home setup or a mobile production environment, the EXO Series adapts seamlessly to your space and workflow. Its versatile connectivity options, precision tuning capabilities, and compact form factor make it the perfect monitoring solution for any modern producer or audio engineer.
Designed with both creators and critical listeners in mind, the EXO Series delivers uncompromised clarity, punch, and depth, empowering you to hear every nuance of your mix exactly as it is.
Experience the next evolution in monitoring. Experience EXO.
The packaging of each EXO monitor contains the following items:
1x EXO monitor
1x Power supply cable
4x Sticky rubber feet
1x Quick start guide
Carefully remove the monitor from the packaging.
Connect the power cable to the monitor and plug it into a suitable power outlet.
Use XLR, RCA or S/PDIF to connect the monitor to a sound source.
Turn on the monitor using the power switch on the back.
Select the input using the knob on the monitor’s rear panel.
Following these steps is all it takes to start using the monitors. To make use of the full potential of the units, make sure to read the full manual.
Each EXO monitor features a Smart Control Display and a Smart Control Knob located on the rear panel. These controls allow you to access and adjust all monitor settings.
To access the menu, press the Smart Control Knob once.
Rotate the knob to scroll through the available settings.
Press the knob again to select a setting.
Press and hold the knob to go back.
To wake the display, either press or turn the knob.
The system will return to the Volume screen after 10 seconds of inactivity.
The display will turn off after 60 seconds of inactivity.
Default setting: 0.0 dB (no change to input level).
Turn right to boost up to +10 dB (in 0.5 dB steps).
Turn left to reduce down to -60 dB (mute).
Adjust using the Smart Control Knob.
The Smart Filters section allows precise tuning of the monitor’s response in different frequency ranges.
Turn the Smart Control Knob to scroll through the filters: Low, Desk, Mid, High.
Press the knob to enter a filter’s settings.
Turn the knob to adapt the filter.
Press again to confirm the setting and return to the filter menu.
Press and hold to return to the main menu (or wait 10 seconds for auto-exit).
Low
Low-shelf boost / Cut
Boost below 300 Hz as low shelf filter/
The cutoff starts at the speaker's lower –3 dB point and can be increased in ten 5 Hz increments, using a 24 dB/octave slope.
Desk
Bell filter, -5 to +3 dB
Compensation for desk reflections.
Mid
Bell filter, -5 to +3 dB
Boost or attenuate mid range.
High
High-shelf, -5 to +3 dB
Adjust high-frequency response.
Use the Smart Control Knob to select the input source:
Analog Balanced (XLR)
Analog Unbalanced (RCA)
Digital S/PDIF (Select Left or Right channel)
S/PDIF Mono (Turn further to engage mono mode)
When switching sources, the monitor performs a short fade-in/out for clean transitions.
This setting adjusts the sensitivity of the analog inputs only.
-10 dBV (Consumer level) – Default
+4 dBV (Professional level)
Turn the knob to switch between levels.
Use this setting to compensate for speaker placement differences.
Adjustable up to 18 ms (equals 619 cm /20.3 feet of distance).
Steps: 0.3 ms / 2,15 cm ( 0.85”)
Turn the knob to increase or decrease the delay.
Adjust the brightness of the front LED logo by turning the knob.
Note: Status indicators are not affected by brightness settings.
Configure system behavior:
IP Configuration:
Auto (DHCP): Automatically assigns an IP address
Manual: Set IP manually using the knob.
Standby Time:
Select from 15 / 30 / 60 minutes or Off.
(Default is 30 minutes)
Reset Config:
Restores all configurations to factory defaults and restarts the monitor. After the restart DO NOT turn off within the first 10 seconds.
Note: The firmware version is not affected.
Displays version numbers for:
Main firmware
DSP
Bootloader
Use for troubleshooting or update verification.
Shows alerts and system messages. To notify you about an alert the Status LED Logo will turn purple and a warning icon will appear on the Volume page.
Possible alert messages:
Duplicate IP Address:
Issue: Two devices in the network share the same IP.
Solution: Ensure the speaker's IP address is unique within your network. Check other devices like computers, TVs or phone. Verify your DHCP server settings (typically on your home router), or talk to your network administrator, if applicable.
The following icons may appear on the main volume screen:
Monitor is connected via Ethernet.
DSP is receiving an audio signal.
External configuration is being applied via software.
There is a pending system message in the Alerts section.
All EXO monitors feature an EVE Audio LED logo on the front-panel that provides real-time status feedback.
Glows white on power-up.
Brightness can be adjusted using the Smart Control menu.
Slow white pulse
Firmware update in progress or Recovery Mode active
Wait for update to finish
Orange flashing
Input signal too strong
Reduce input signal volume
Purple
Alert message available
Go to Control menu > Alerts
Bright red
Firmware crash or fatal error
Turn the speaker off and on again. If the issue persists, start the speaker in recovery mode (see next section).
Recovery Mode can be used for troubleshooting firmware-related issues on your EXO monitor.
How to Enter Recovery Mode:
Power off the monitor using the power switch.
Press and hold the Smart Control Knob.
While holding the knob, turn the power switch back on.
Continue holding down the knob until the countdowns timer shows '0', then release the knob.
Once active, the Status LED Logo on the front panel will begin pulsing white.
IP Configuration
More info here
Firmware Info
More info here
Reset Configuration
Resets all user configurations to factory defaults.
Note: This does not change the firmware version.
Start…
Launches the monitor with the currently installed firmware, or enters the Firmware Updater if applicable.
A firmware updater will be available when the first update is released. This software will automatically check for and install updates.
It’s not available yet—but if you’d like to be notified when it is, sign up for our newsletter using the form in the footer below.

No worries, we’ve got your back. If anything’s confusing or you’re stuck, just drop us a message below. We are happy to help!

© 2026 EVE Audio GmbH